
Table of Contents
In the previous post we learned the basics of Azure virtual networks (VNETs). In this post we will look at the steps of creating an Azure Virtual Network.
Methods to Create Azure Virtual Network
An Azure VNET can be created
- directly via the GUI using Azure Portal, or
- can also be created via Azure CLI or
- using PowerShell
The easiest and convenient way though is creating it via GUI which we are going to cover in this post.
Create Azure Virtual Network via GUI using Azure Portal
As a prerequisite to Create Azure Virtual Network (VNET), you need to create a resource group in a particular Azure region. You can think of an Azure resource group as a container that holds the resources for a particular solution implemented on Azure Cloud.
In order to create a resource group, log in to Azure Portal (https://portal.azure.com) using your account credentials > Search Resource Group

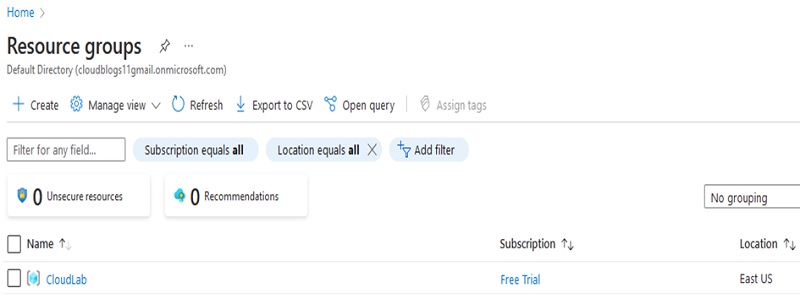
Click Create Resource Group > Give it a name and assign it to a region > Click Review and Create

Once created, you can see the resource group as below:
Step 1: Once the resource group is created, we begin the creation of the VNET. Again, in the search bar type VNETs

Step 2: Click on Create > On the next page you get a page as below:
In order to create the VNET you need to select configuration options in tabs as are shown on the VNET creation page.
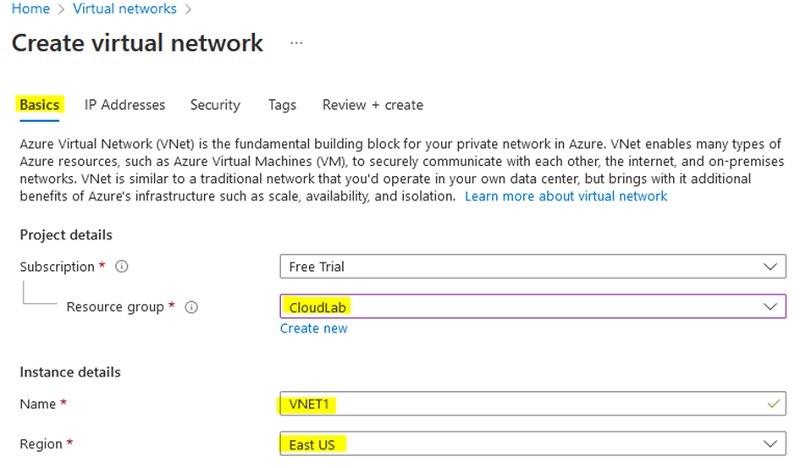
Basics, IP Addresses, Security, Tags, Review & Create
Under Basics Tab, select your Azure subscription, Select Resource Group we created earlier, assign name for a VNET and select region in which this VNET will live.
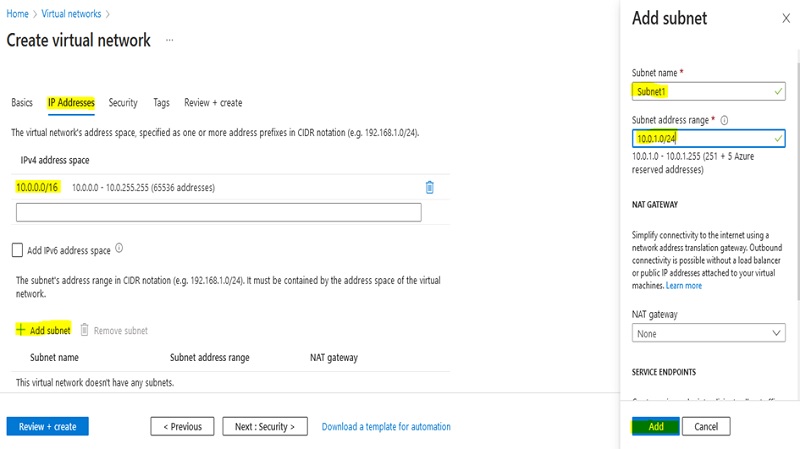
Under the IP Addresses Tab, you can define the IP address space for your VNET and also create the related subnets from the address block defined for the VNET.
IP address space is assigned to a VNET in CIDR format. The IP address space assigned to VNET has to be unique.
Just to add clarification on the above point, we can have the following two VNETs operating independently but they cannot be peered as they have some IP addresses overlapping.
VNET1:
- CIDR Range: 10.0.0.0/24
- IP Addresses – 10.0.0.1 – 10.0.0.255
VNET2:
- CIDR Range: 10.0.0.0/8
- IP Addresses – 10.0.0.1 – 10.255.255.254
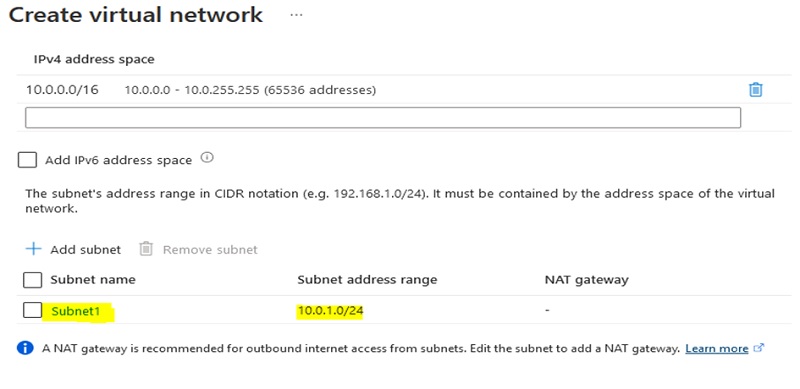
In our example we create VNET1 only and then add subnets to these VNETs.
Once you Click Add the subnet appears on the page as below:
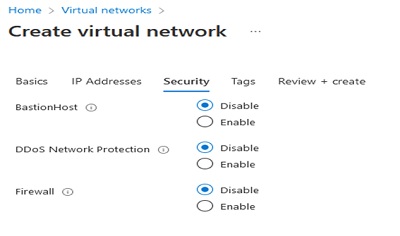
Under the security tab, you can enable/disable security features i.e., a BastionHost, DDoS protection Standard & Azure Firewall for the VNET. We leave them to default values as part of this post.
Step 3: Create Tags if needed, Next, we Click on Review + Create Tab, verify our configuration setting and click Create. This will start your VNET creation and you can monitor its creation under the notification icon on the portal.

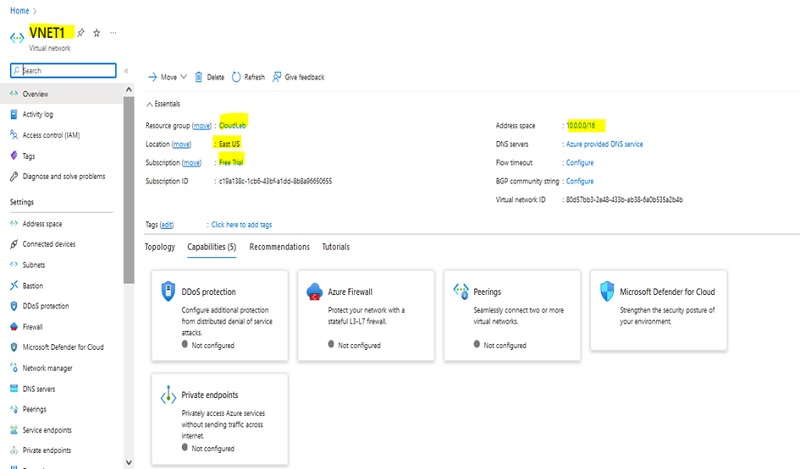
Once created, you can view your VNET at page below:
After successfully setting up an Azure Virtual Network, it is crucial to prioritize securing and safeguarding the resources within the network. Regardless of whether the approach is entirely cloud-based or a mix of cloud and on-premises data center, the same principles of networking still hold. It is important to identify and secure the resources that can access others, and also take measures to defend against external threats.
FAQs related to Azure Virtual Network
Q1 How can I create Azure Virtual Network?
- Azure Virtual Networks can be created using various methods, including the GUI/Azure portal, Azure PowerShell, and Azure CLI. Additionally, several infrastructure as code languages, such as ARM templates, Ansible, Terraform, and Azure Bicep, can also be utilized to create virtual networks.
Q2 What is the cost of utilizing an Azure Virtual Network?
- Setting up Azure Virtual Networks is free of cost. However, if you connect virtual networks, you will have to pay based on the amount of incoming and outgoing network traffic. Furthermore, if you choose to use virtual network gateways or firewalls, there will be an extra fee.